How to Make a Book Teaser Using PicMonkey
Lately, I’ve been having a lot of fun making image teasers–or memes–for my books. Fans seem to like the visual representation of a character or scene and it’s just another way to get new eyes on some of my favorite quotes from my books. But how do you make one?
You could use any image editor to do this, but I like to use a web-based application called PicMonkey. It’s easy, has some amazing tools, and doesn’t take long to learn to use. Here is a brief walkthrough of how I made my latest book teaser with PicMonkey.
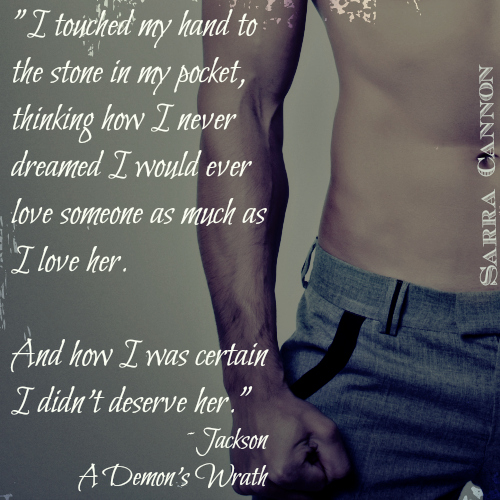
First, I chose a snippet of text from the book I want to feature. I chose this line from my most recent release, “A Demon’s Wrath”.

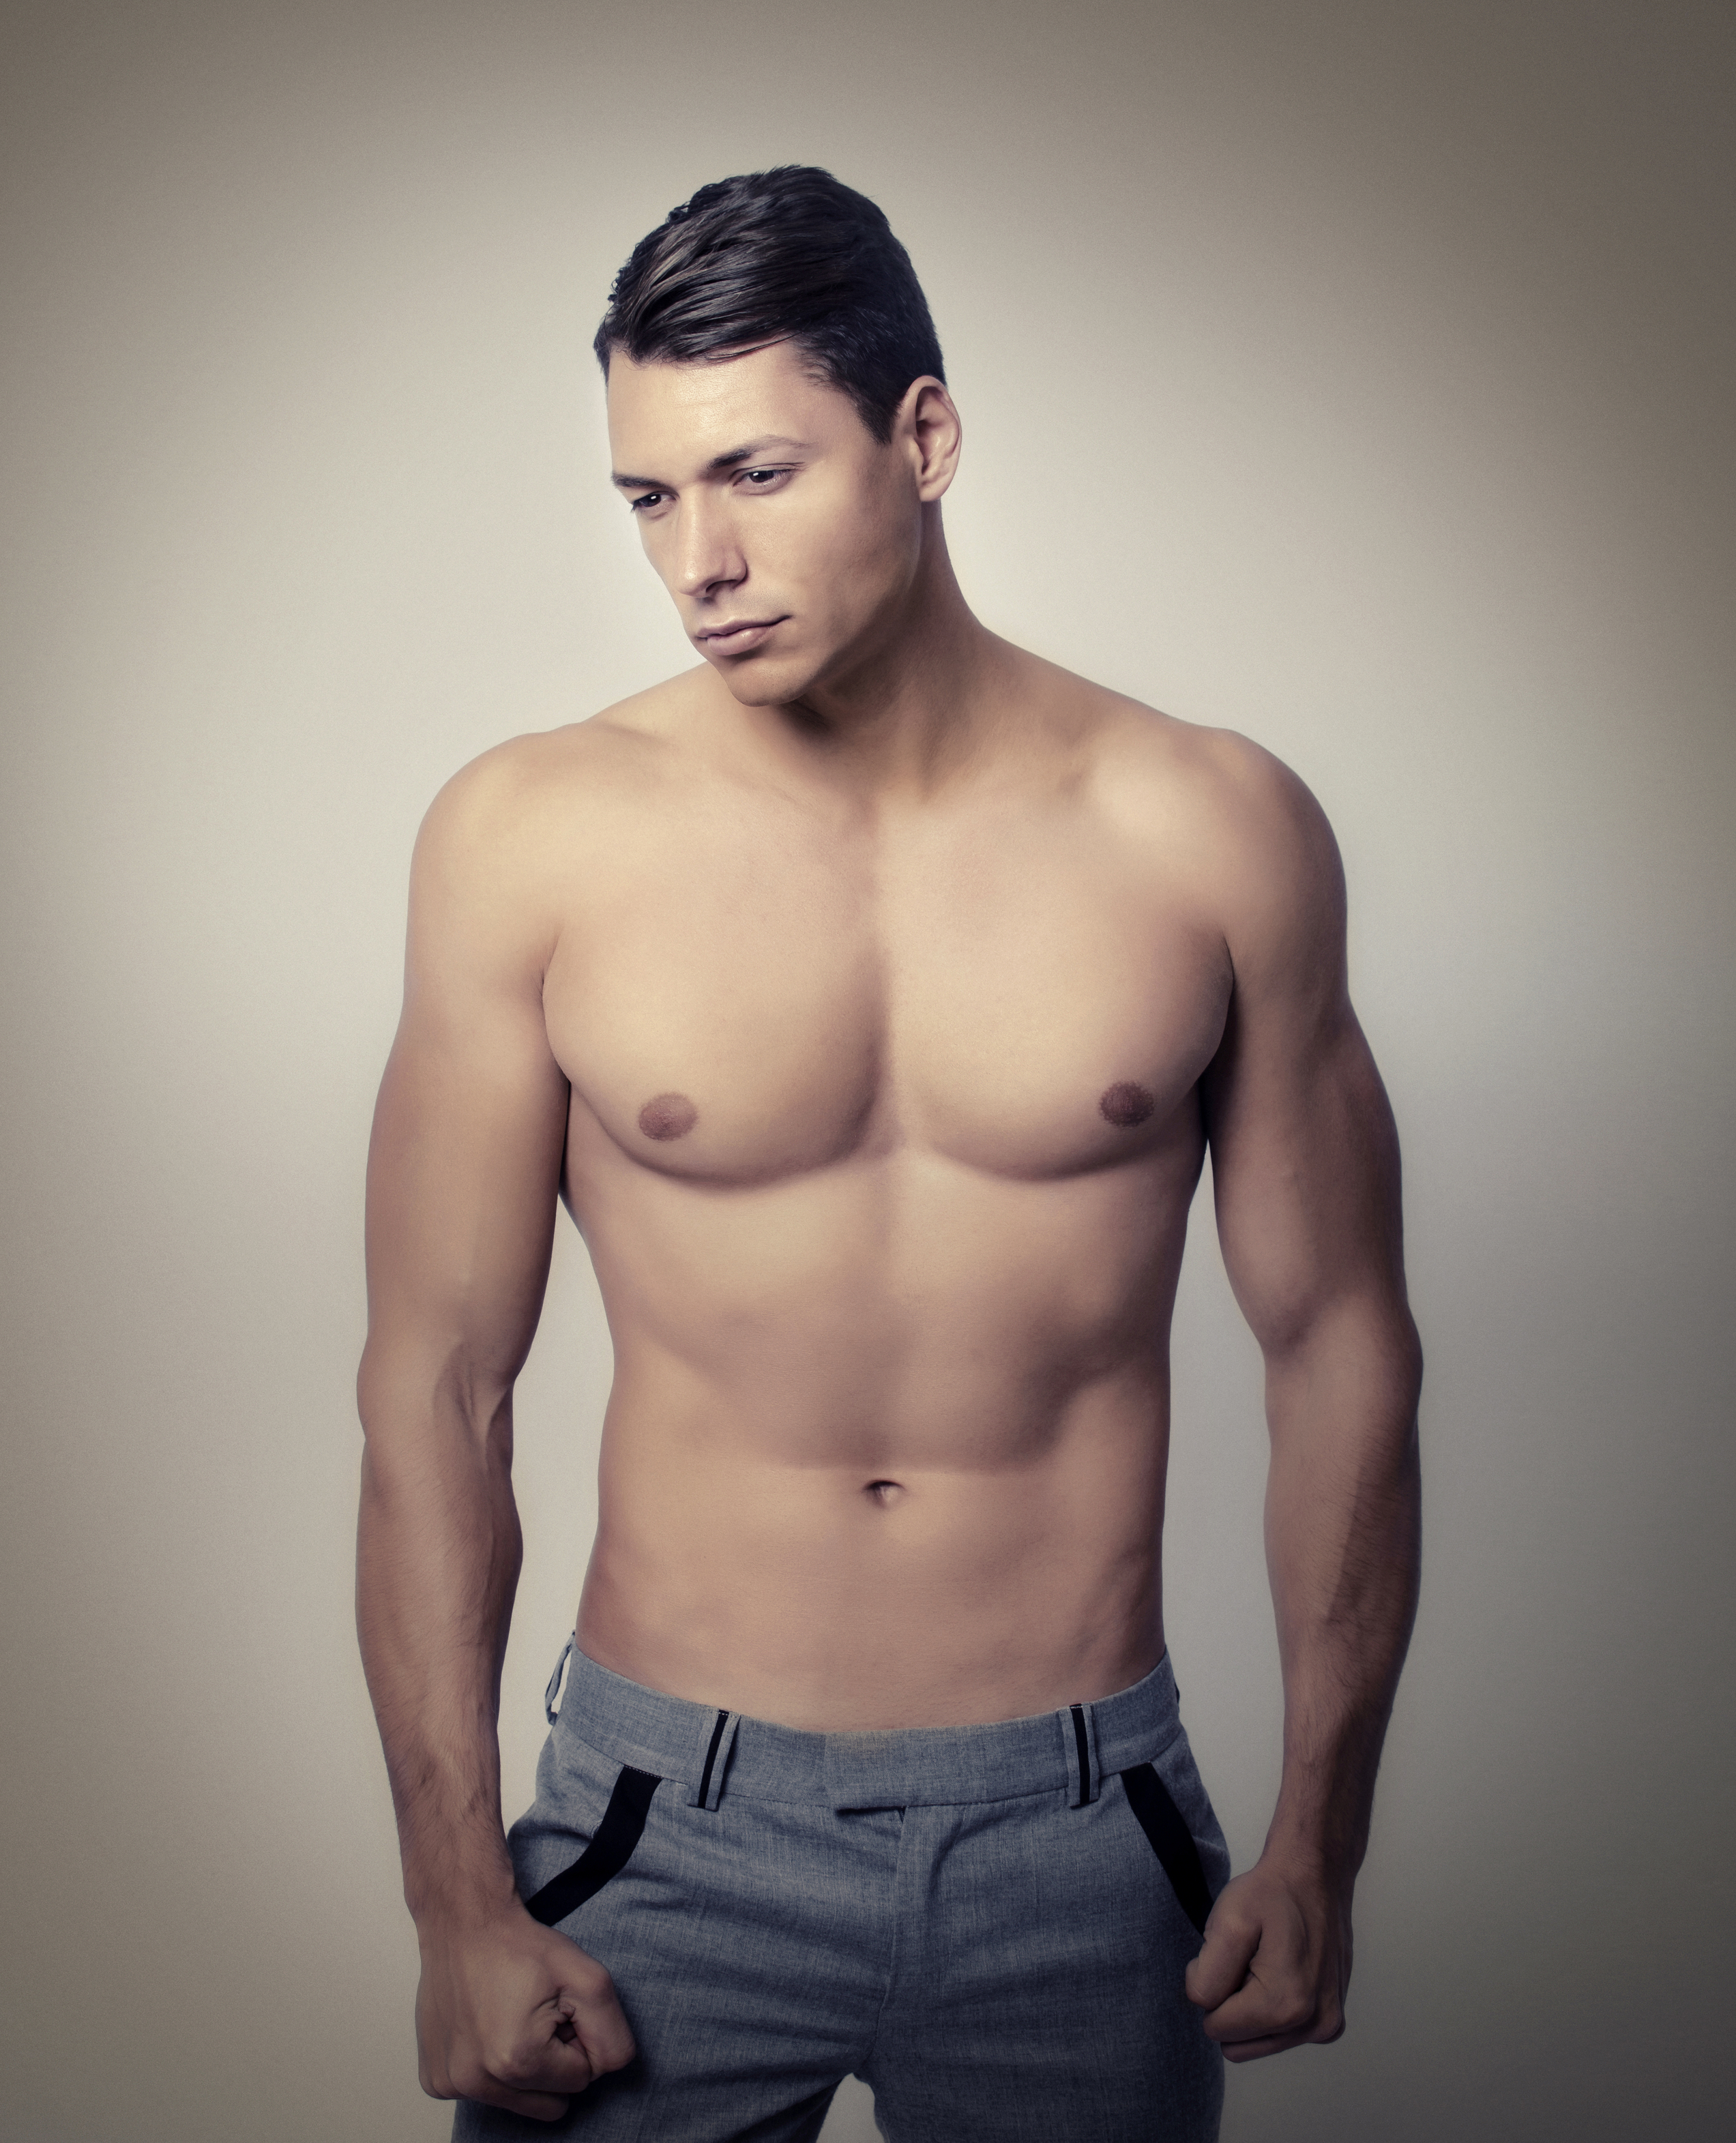
Once I had the text I wanted to use, I went to some of my favorite stock photo websites to get a picture that fit the text. Since he’s talking about his hand near his pocket, I went to one of the sites where I happen to already have credits and searched for “Male pocket”, which brought up a ton of pictures of hot guys with their hands in their pockets. For this project, I happened to download from Deposit Photos, but there are lots of great stock sites out there like BigStock, Dreamstime, Shutterstock and more.
I chose this photo:
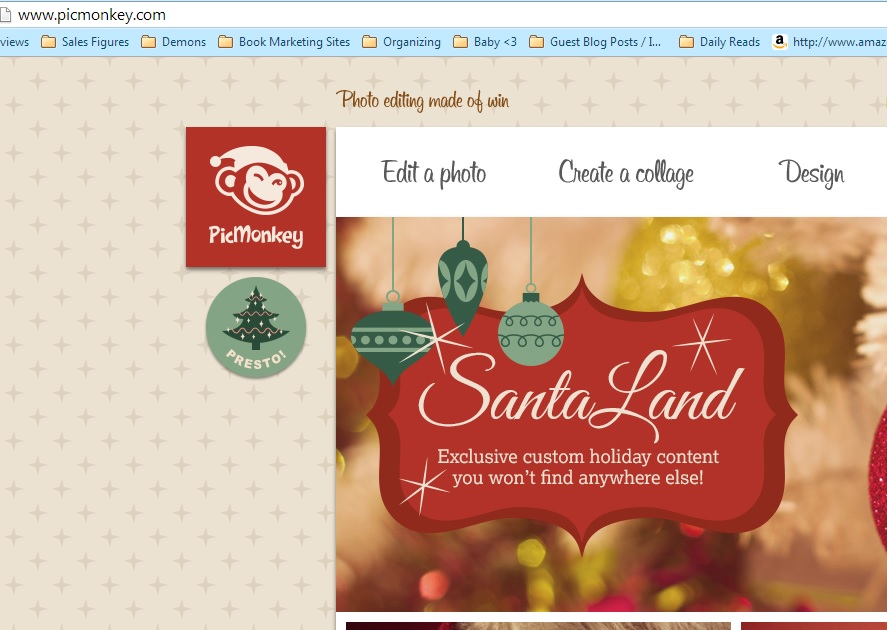
Now I’m ready to edit my photo inside picmonkey. All you have to do to use PicMonkey is open your browser and go to http://www.picmonkey.com/. They have both a free version and a premium version. Some fonts, styles, etc won’t be available in the free version, so it’s up to you whether you want to pay for the premium service or not.
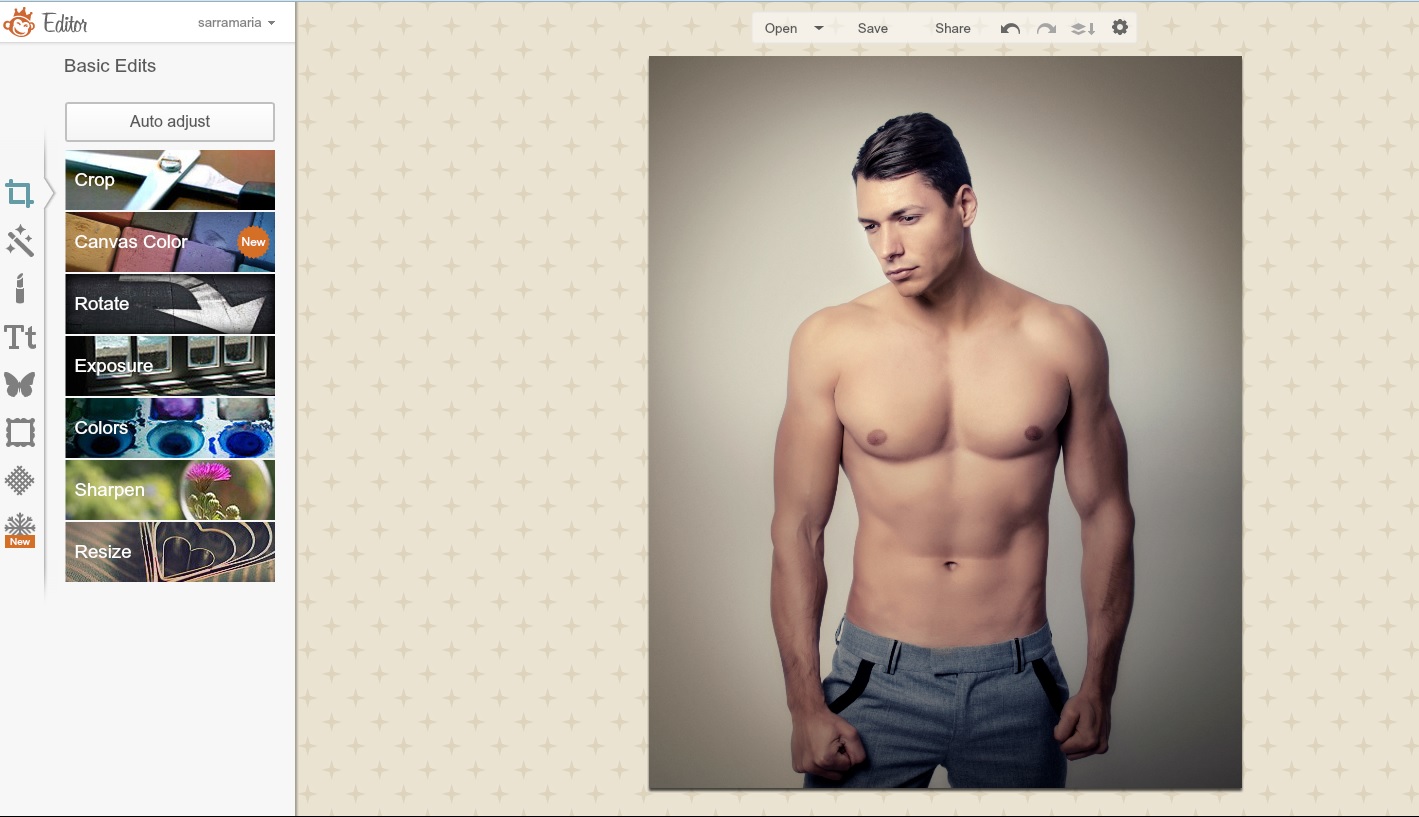
To begin, click “edit a photo”.
 This will bring up a system dialog where you can choose the picture you want to use or edit. I selected the photo I just downloaded from Deposit Photos. IMPORTANT: You MUST have the right to use any photo you plan to use for a teaser. This means it has to be a photo you either took yourself or purchased the right to use. This is why I download stock photos by using credits I paid for. Most of the time, you can use the smallest version of these pictures for web purposes like sharing on Facebook. They will usually only run you a dollar or two at the most. If you don’t want to pay, you can search online for free stock images, but be careful to make sure you have permission to use this photo!
The first thing I always do is CROP my photo. You don’t have to do this, but I like to try to keep my photo square and relatively small since I’ll be using it on Facebook or other social media sites. When I click “CROP” on the left-hand side of the screen, it brings up a cropping box to my picture, as well as some different options.
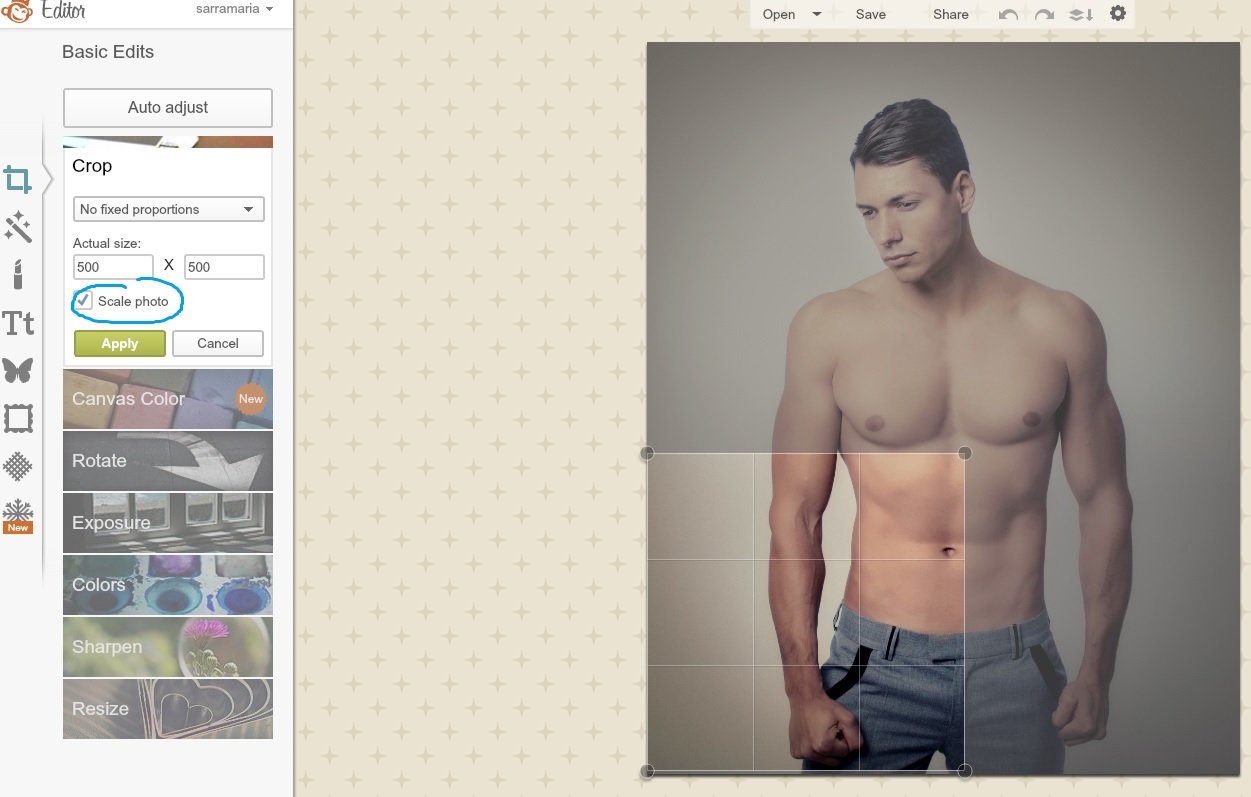 I like to set my size at 500 x 500 and then I click the box that says “Scale photo” so that I can select the area I want to use and keep it 500 x 500. Play around with the options under crop to see what they all do!
Once I have selected the area I want for my teaser, I click “APPLY” to crop the photo.
There are other things you can do with these basic tools. You can change the canvas color, rotate your image, change the exposure or contrast and resize the image or recolor the image. I usually just move on to the “EFFECTS” tab, which looks like a little wand on the far left.
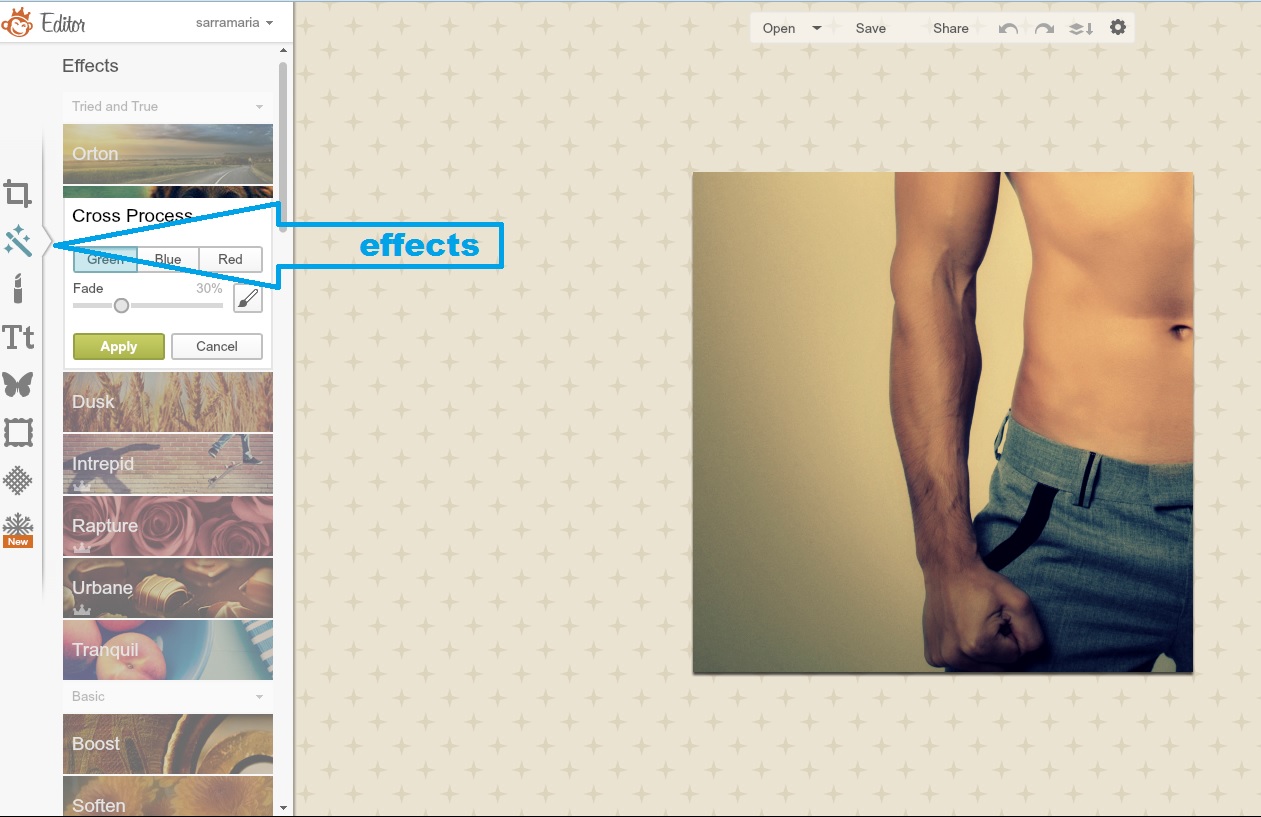 Here’s where things get fun and where you could spend all day playing around. The effects listed range from different filters and colorings to adding soft edges or a frosted look to your image. Spend some time playing around with these.
To see what an effect will do, simply click on it. It will give you a preview of your new image, but won’t save it unless you click “APPLY”. You can go from one effect to the next, sampling different looks until you find one you’re happy with. You can also apply one effect, then move on to a different one and apply that as well. Once you’re sure of an effect (or effects) you want to use, click “APPLY”. Here, I used the “Cross Process” effect in blue and then scrolled down to the “Gritty” effect and made it more transparent using the FADE slider.
Next, I want to go to the “OVERLAYS” tab, which is the little butterfly on the left.
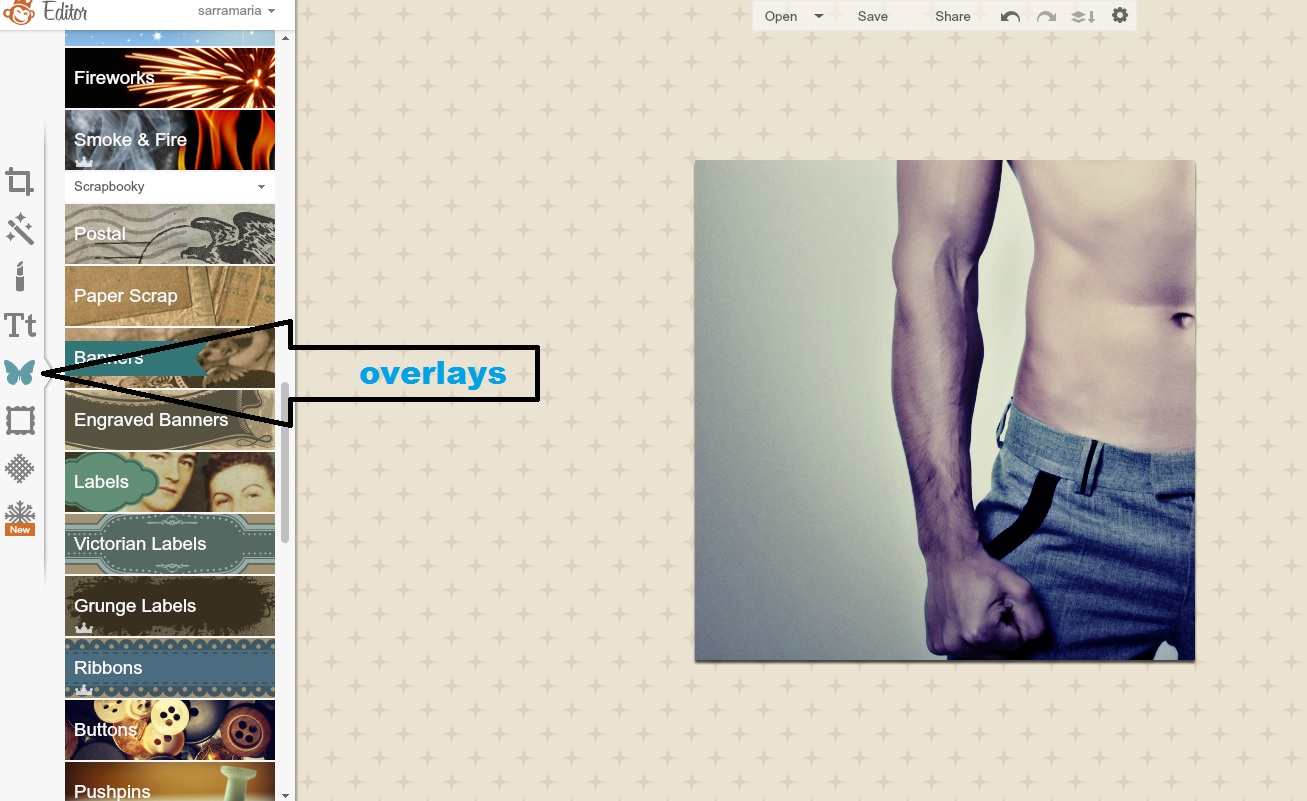
Again, you have hundreds of options here. You can put anything on top of your picture from a flower to a bumblebee. Most of the time, I choose a ribbon or label to go over the top. The reason for this is to create a darker area for me to place the text so that it stands out from the picture and is easier to read. This time, I chose a “Grunge Label”.
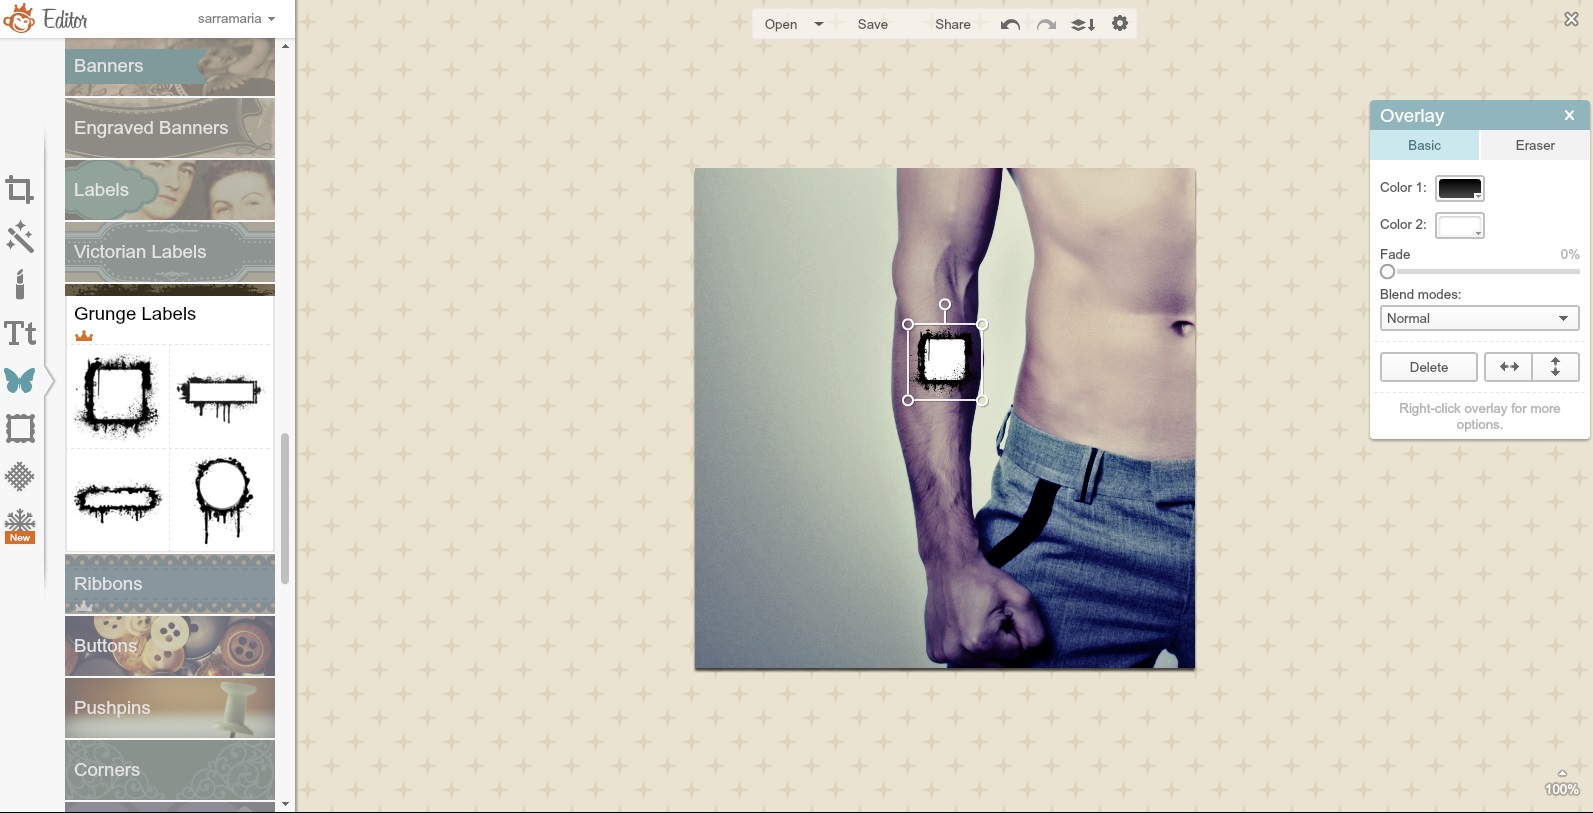
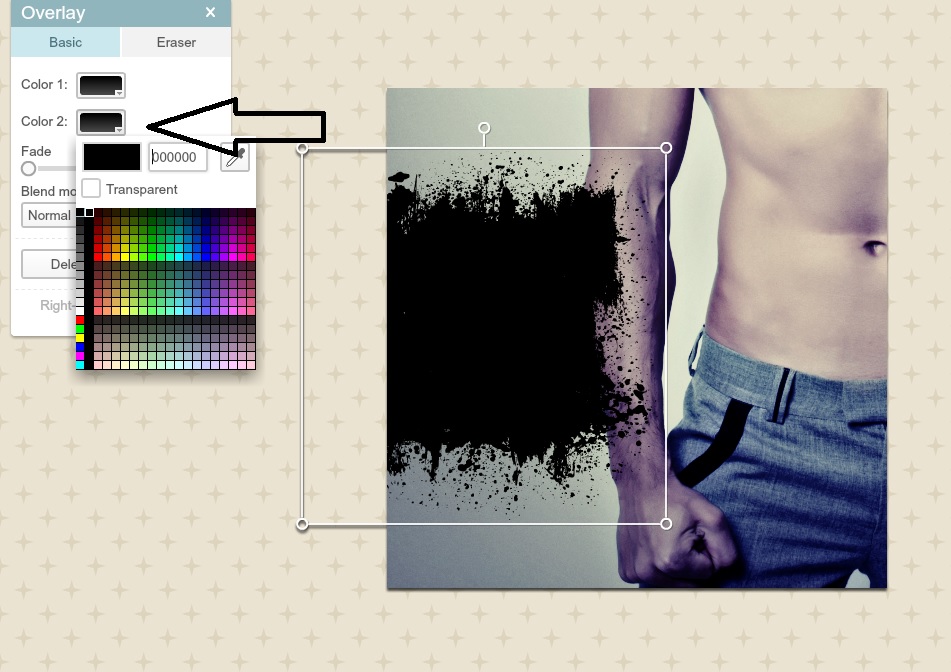
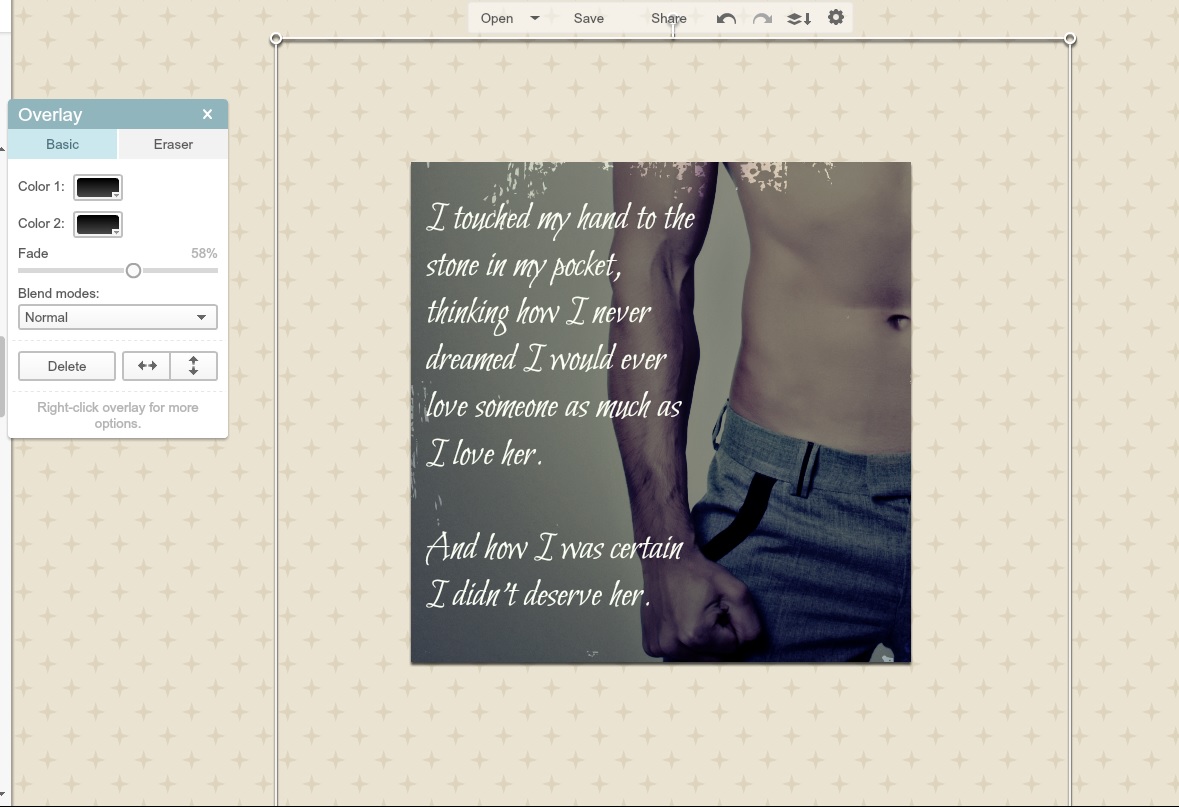
When you select a label, it will place it on top of your picture and bring up a special box for that overlay. Inside the box, you can choose the colors of the overlay (default is black and white), the transparency or fade, and the blend mode. Using the sizing box around the label, you can drag out to make it bigger or smaller and you can place it anywhere you want on your screen. Below, I have made mine bigger and moved it to the left.
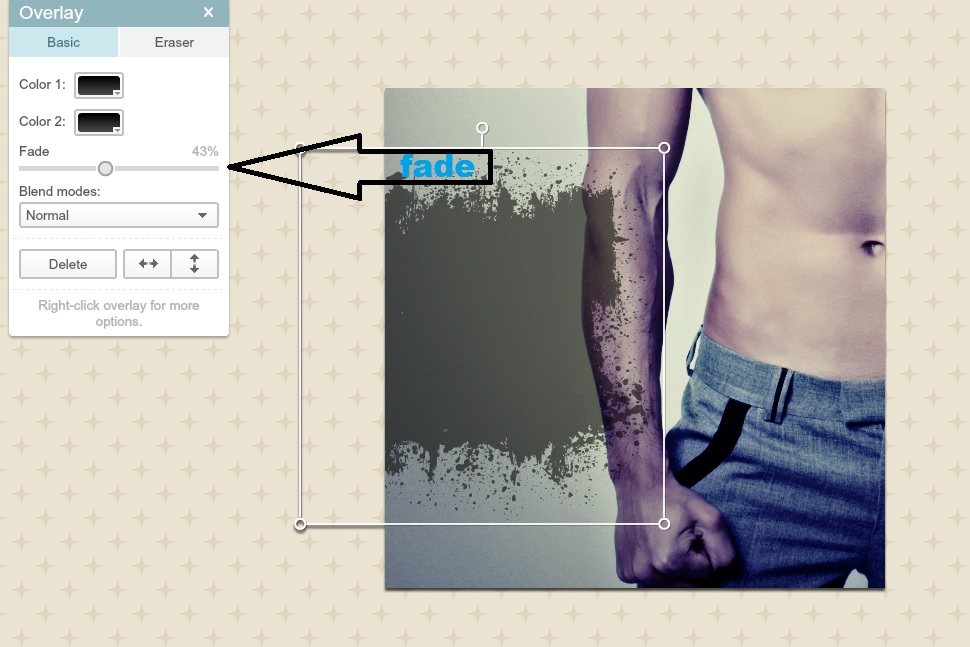
I want to make the whole thing black and more transparent so I can see the image behind, so I click on “color 2” and make it black, then slide the Fade bar to a more transparent percentage.
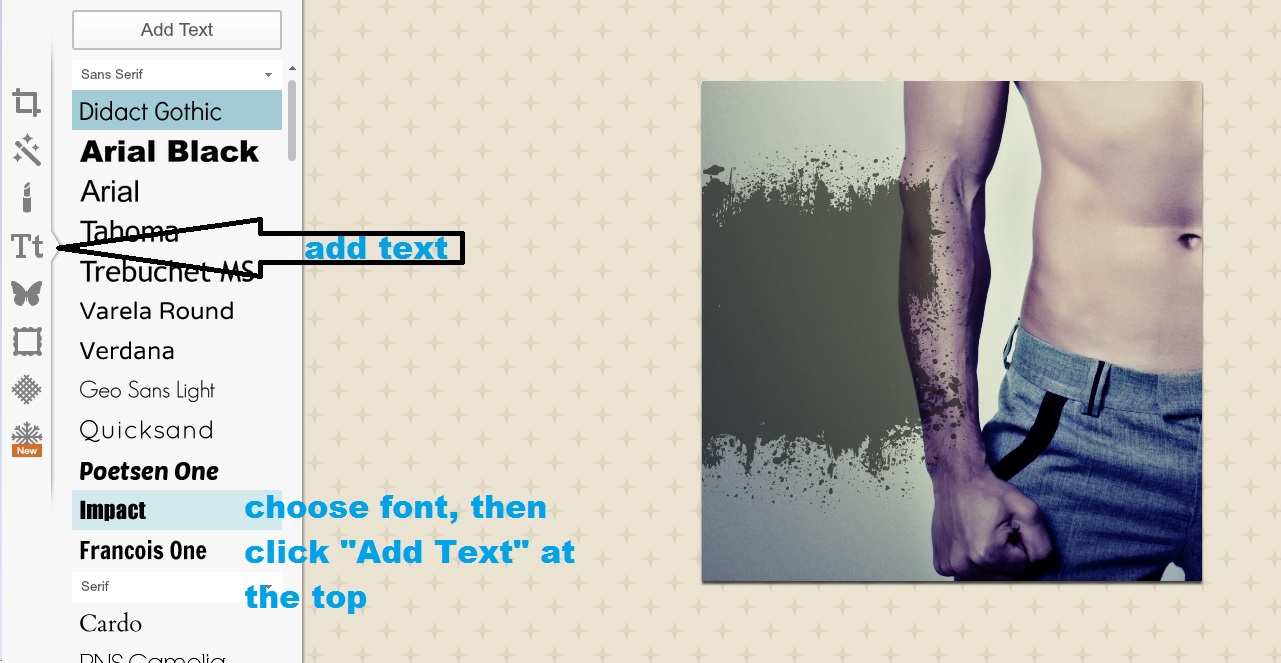
Now I’m ready to add my text to the teaser image. I choose “TEXT” on the left side of the screen, marked by a capital and lowercase Tt. This will bring up a list of fonts I can use. If a font has a crown beside it, it is only available to premium members. Once you see a font you like, choose it and click “ADD TEXT” at the top.
 Type in your teaser text.
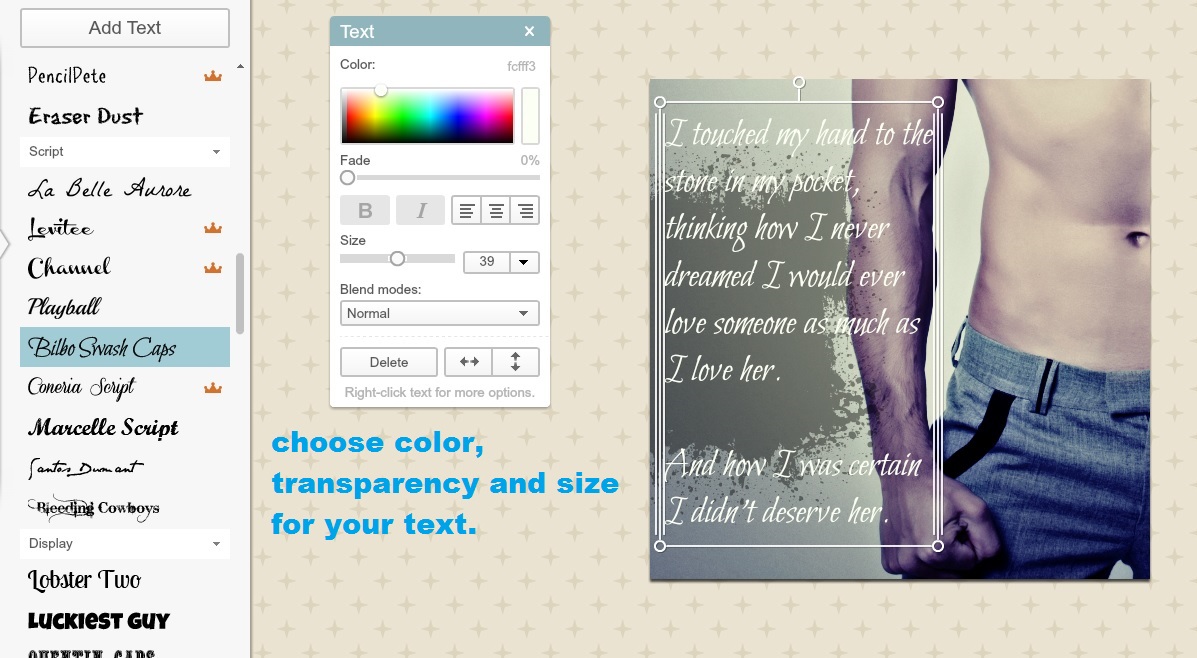 You can use the text popup box to choose the color of your text, the transparency or fade, the size and the alignment. (Hint: If you want to match the color of something in your picture, click on the bar to the far right of the color bar and a little dropper will appear. Now click on the color you want to use from your picture. This will auto-select that color for your text.)
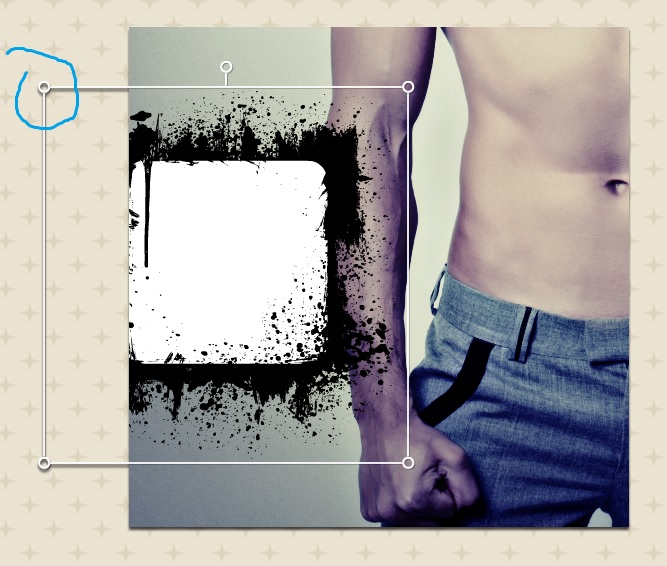
As you can see in my example, the text is much bigger than the overlay. To fix that, I’m going to stretch my overlay to encompass all of the text. After playing around, I actually decided to stretch my overlay over the entire photo like this.
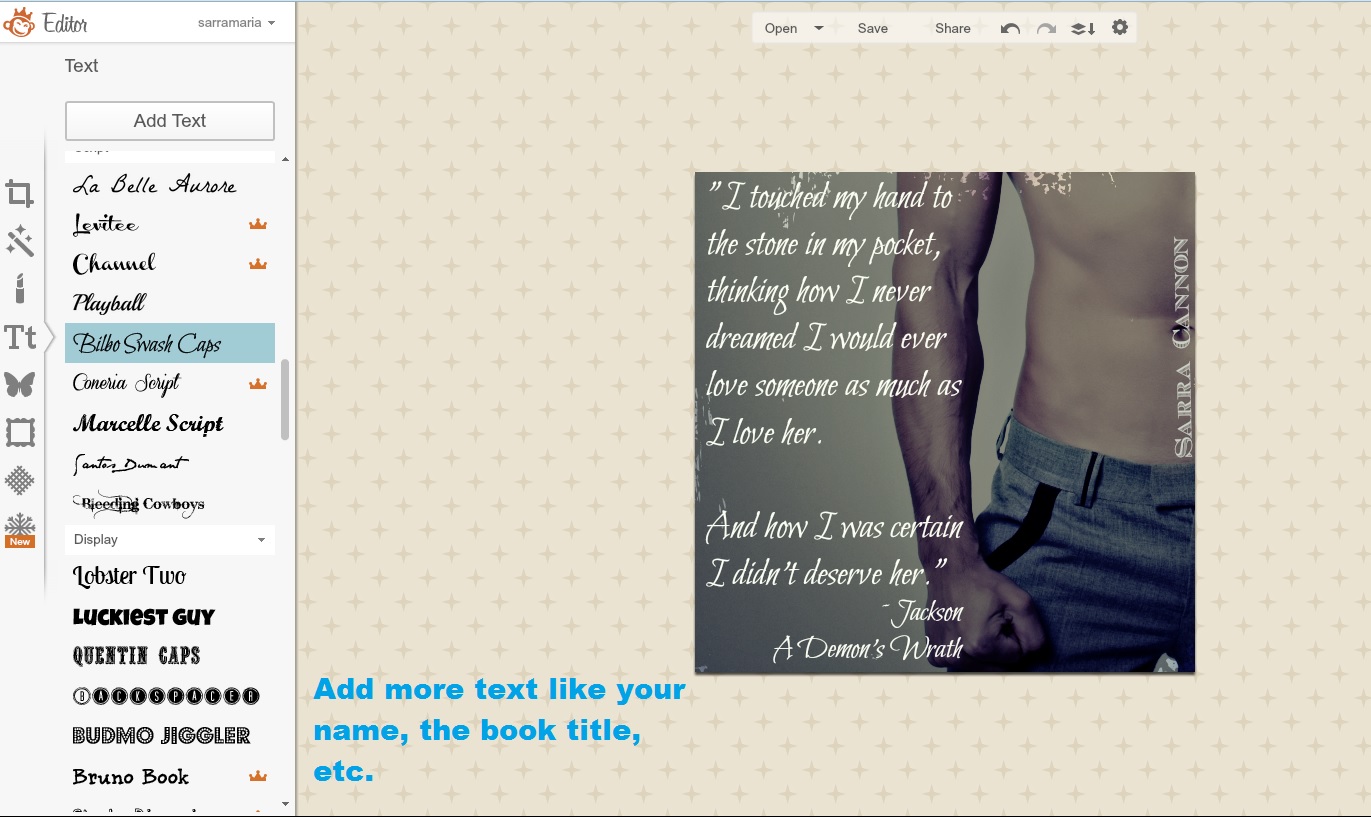
Finally, I want to add more text. Since this teaser might get shared or included on a blog, I want to make sure to add my author name and the title of the book. I go back to the text area and add these to my photo.
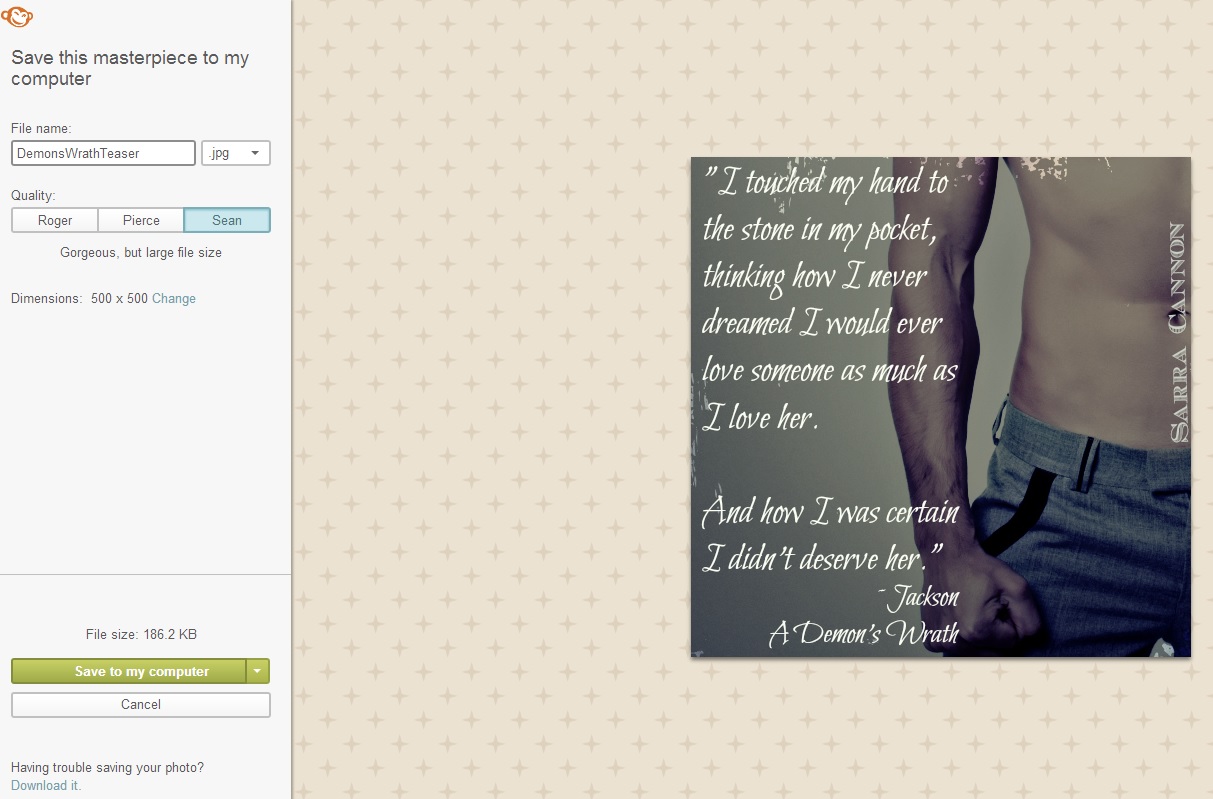
Voila! My teaser is done! Now all I have to do is click “SAVE” at the very top of the page and save my image to my computer. (HINT: Once you save your image and close picmonkey, they will be no way to go back and edit this photo, so make sure you have it exactly the way you want it before you close the browser!) If you want to make some changes, you can use the back arrow to take away edits. You can also click “Share” and share to your FB or Twitter right from this page.
There are lots of options inside picmonkey that make it easy to create a teaser. Hopefully this walkthrough will help you learn some of the basics!