How to Publish an eBook on Amazon
How To Publish An Ebook On Amazon
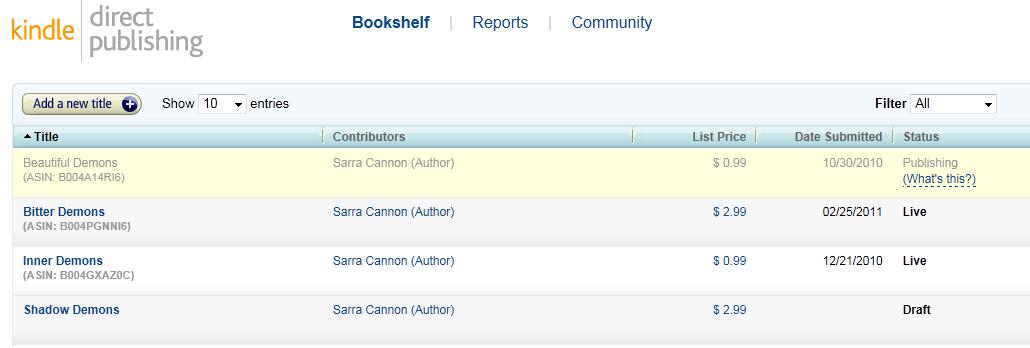
Self-publishing through Amazon’s Kindle Direct Publishing (KDP) platform is quick and easy. I thought it might be helpful to write a quick walk-through to take new users through the publishing process one step at a time using screenshots. In order to get started, simply follow this link to the Kindle Direct Publishing site, sign on with your amazon account, or create a new account. When you first sign in, you will be looking at your Kindle Bookshelf. Until you begin adding books, your Bookshelf will be empty. Here is an example of my Bookshelf with my first three books already published. (Note: I recently made a change to my first book, Beautiful Demons, which is why it says “Publishing” instead of “Live”. The book is still available for sale, but the changes are currently in review.)

Your new titles will have a status on the far right side of your Bookshelf. “Publishing” means that your book is currently being reviewed and will be published to the Kindle store soon. “Live” means that your book is available for purchase in the Kindle store.
So let’s learn how to add a new title to your Kindle Bookshelf. In the upper left hand corner of your Bookshelf page, you will see the option to “Add a new title”.
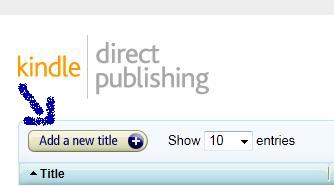
Clicking on this button will take you to the publishing screen where you can enter the details for your new book.
The first thing you will be asked is whether you want to enroll your book in KDP Select. KDP Select is an agreement to list your book exclusively on Amazon for 90 days. In return , they place you in their Kindle Owner’s Lending Library where members of Amazon Prime can ‘borrow’ your book for free. You will get paid for each of these borrows. You will also be given 5 days during this 90 day period when you can list your book for free. You will also earn a 70% royalty on books in certain markets such as India, Brazil and Japan. If you wish to enroll in KDP Select for the next 90 days, you will check the box here at the top of the page.
Next, you will enter your book details, such as title, series title, book description, author, and so on.
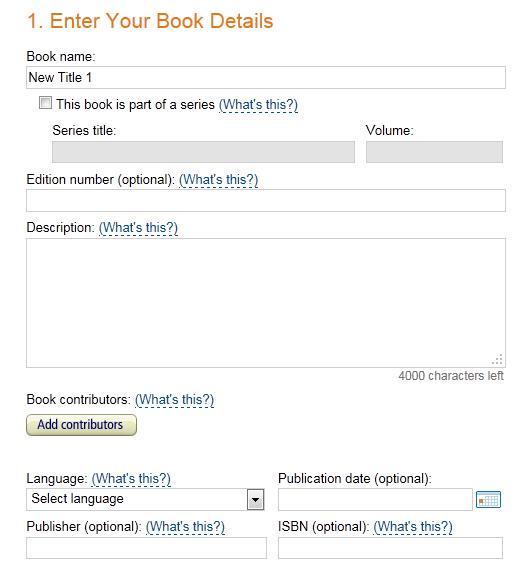
Now, let’s take this one box at a time. First, you will need to enter your Book name. Give some thought to your title as this will be your first level of marketing. Just as an example, I am going to fill in the boxes as if I were publishing the fourth book in my Peachville High Demons series, Shadow Demons.

Next, you will need to indicate whether this book is part of a series or not. If your book is part of a series, check the box to indicate that it is. If not, simply move on to the next step. If your book is part of series, enter the series title in the box. Where it says Volume, enter the number this book falls in the series. For example, Shadow Demons is Book 4 for me, so next to Volume, I entered the number 4.

TIP: On Amazon, your series name will appear in parentheses beside your book title. If you want readers to see which number this book is in the series, you can enter the number into the series title so that the number shows up in parentheses. For example, instead of saying “Shadow Demons (Peachville High Demons)” when users see my book, it will now say “Shadow Demons (Peachville High Demons, #4)” to give the reader more information up front. This is something that has helped my readers find the book they are looking for faster. Either way is correct, just put some thought into how you want your title to appear in searches.

In the next box, you have an option to enter an Edition Number. I would say this has more use for a non-fiction book that has been updated with new content. However, if you have made changes in grammar and format and content to your fiction book, you could mark your new upload as a second or third edition. Personally, I do not use this box.

Below the edition box, you will find the Description box.
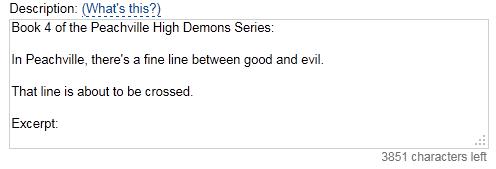
Here, you will have a maximum of 4000 characters to describe your book. Think of this like the back cover blurb on any paperback. This is where you give readers a hook to entice them to read your book. But, you can add more than just a short teaser. Feel free to utilize this space to give readers a juicy excerpt of your book. You can use this space to include reviews that might help give your book more credibility and appeal. In the same way that successful authors often give cover quotes to books, you can include quotes from other writers here in the description of your book. For example, a cover quote from another author might look like this: “Shadow Demons haad me on the edge of my seat. A must read!” – J.K. Bowling. 😛
Now, add contributors to your book. This is where you will enter the author name and any other names you would like included. Click on the “Add contributors” button.

A new box will pop up, asking you to enter the name of people who contributed to your book. First and foremost, you need to enter the author’s name. If you are using a pen name for your books, you need to enter it here as this is the author name that will appear on your book’s page.
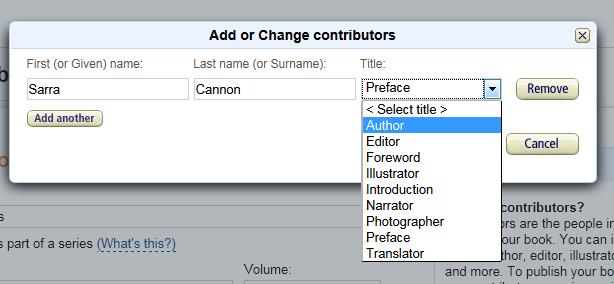
From the drop-down box, select the title of the person you wish to acknowledge. Personally, I only make use of the “Author” title, but if you are publishing a picture book, you would want to include the name of your Illustrator, for example. Once you have entered the name and title of a contributor, click “save”.
The next set of boxes are pretty self-explanatory. Several of these next boxes are optional, but I will go over each of them briefly.

From the drop-down menu, select the language your book is written in. In the next box, choose a publication date. This is optional. If you do not enter a date, the system will automatically mark your publication date as the date you first put your book for sale. Next, enter the name of your publisher. For example, I started my own company, Dead River Books, so that I can publish all of my own works under the same publishing company name. This is completely optional. If you do not list a publisher, I believe it will simply say “Amazon Digital Services” by default, but I could be wrong about that. Finally, there is a spot for you to enter an ISBN for your book. Again, this is optional. Amazon does not require you to purchase an ISBN for your ebooks. It is important to note, however, that you CANNOT use the same ISBN for your ebook that you used for your print book. Each digital format must have its own unique ISBN. Click on “What’s this?” for more information on where you can purchase an ISBN if you would like to have one.
Part 2 – Verify Your Publishing Rights. This is a simple choice. Here, you are simply indicating whether or not your book is part of the public domain. If so, the rights to this book belong to everyone. Chances are, your original book is NOT part of the public domain. Select “This is not a public domain work and I hold the necessary publishing rights.” Obviously, if someone else owns the copyright to your book (such as a previous publisher), you cannot upload and sell your book on Amazon’s Kindle store, so make sure you own the rights to sell your book. If you are self-publishing an original work for the first time and have never signed a contract giving someone else the rights to your book, then you automatically hold the rights to publish this book. I’m sure it goes without saying that you don’t have the right to publish a book someone else wrote unless they’ve sold or given your their copyright. Hopefully I didn’t totally lose you there. Pretty much all you need to do here is choose door #2.

Part 3 – Target Your Book to Customers.

This is one of the most important sections of the publishing process. Here, you will choose categories and keywords to help place your book in the Kindle store. First, click on “Add categories” and select the two categories that BEST match your book. This will bring up a new box where you can Add or Change Categories. Since they currently only allow you to choose two, this will be a little bit of a guessing game. One way to help pick your categories is to find a book you know is similar to yours in the Kindle store and see what categories they are in to give you some idea where your book might belong.
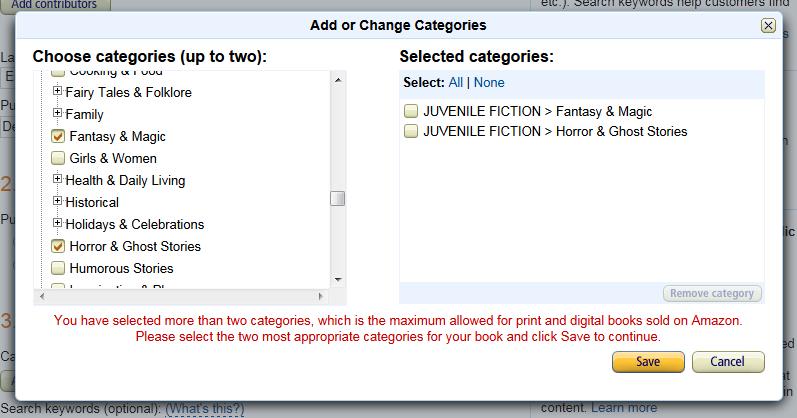
For my young adult book, I selected “Juvenile Fiction” first, then scrolled down and picked two subcategories within that heading – “Fantasy & Magic” and “Horror & Ghost Stories”. “The red message at the bottom of this picture is because I tried to select a third category. If you need to change a category, you must first click beside the one you want to change, then select “Remove Category” before selecting a new one.) When I click “Save”, these categories are now listed on the main KDP page.

Keep in mind that these categories are not set in stone. You can always go back and edit/change these categories at any time.
Now, enter search keywords for your book. This is optional, but I highly recommend it. Search keywords are search terms that help readers find books about certain content. For example, if I love the Hunger Games series, I might go to the Kindle store and search for “Young Adult Dystopian” books. Any books that use this search keyword will show up in my search. You are allowed to enter up to seven keyword terms. When you enter them, be sure to separate them with a comma. Here are a few examples of what I might enter with my book, Shadow Demons:

Search keywords are important and help readers find your books. Experiment with different keywords to find the strongest seven to use.
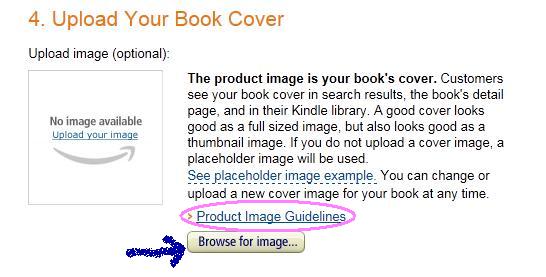
Part 4 – Upload Your Book Cover. In this section, you will upload an image that you would like to use as your book cover. This image is going to be one of your most important marketing tools. Your image needs to be one that will draw people’s attention to your book and make them interested in reading it. You can design a book cover by yourself or hire someone else, but keep in mind that this is extremely important when it comes to selling your book. To read more about what size image you need to use, click on “product image guidelines” on the KDP site. When you have your image prepared and are ready to upload it, click on “Browse for Image” to bring up the Product Image Upload box.
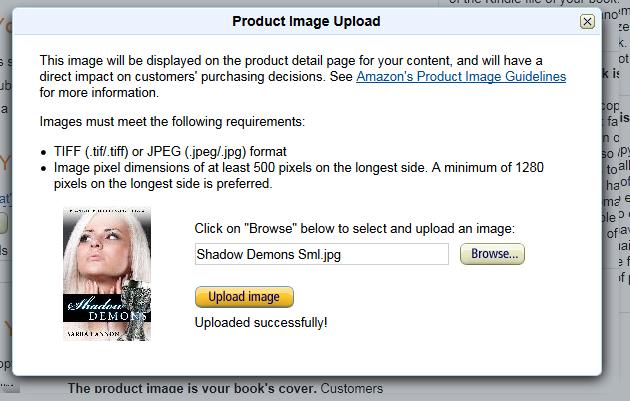
Click on “Browse” and locate your book cover image on your hard drive. When you have selected your image, click “Upload Image”. When the image is finished uploading, you will get a message that says “Uploaded successfully!” and you should see a small thumbnail of your book cover image on the bottom left corner.
When your product image has uploaded, close the dialogue box and continue on to Part 5 – Upload Your Book File.
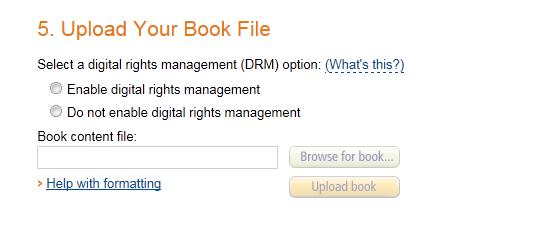
The first thing you need to do in Part 5 is select whether or not to enable DRM, or digital rights management. Here is what Kindle has to say about DRM:
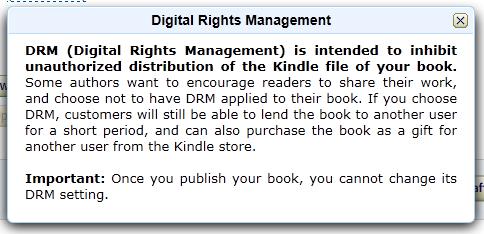
Basically, DRM makes it more difficult for people to share your book with others. Authors have wildly varying opinions on this matter. I believe that DRM is more of a pain in the you-know-what for people who buy the book legally than it is a deterrant for people who want to steal your book. If someone wants to steal your book, they are going to do it regardless of DRM. On the other hand, DRM can make it more difficult for someone who legally bought your book to read it on their devices without a hassle. I always select “Do not enable digital rights management” for my books, but this is a personal decision and you should take some time to figure out which side of the fence you stand on. It is important to note that once you have made a selection about DRM, you can not change your mind later.

Finally, now you can upload your novel to KDP! Click on “Browse for Book” and select your book’s content file from your computer. Once you are sure you have selected the right file, click “Upload book”. Kindle uses a proprietary format called MOBI. For help with learning to format your novel correctly, you can click on “help with formatting” and get information on a few ways to format your novel. You can also use a .DOC file. Kindle’s system will convert your book to .MOBI automatically.
CAUTION: Converting your book from a .DOC file might cause changes in your book’s formatting. Make sure to preview your book to make sure it looks the way you want it to look! In order to get the most control over your document’s appearance, you should format a .MOBI directly and upload that instead of using a conversion.
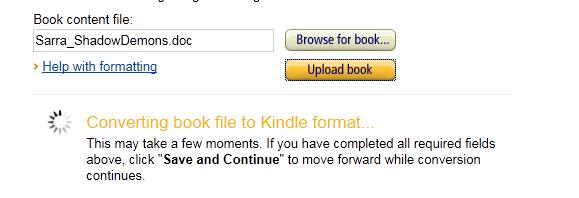
Wait until your book has been successfully uploaded, then select “preview book”.

When you preview your book, a small window will pop up that will mimic a Kindle device. Look through this preview carefully to see what your book will look like once someone buys it and downloads it to their Kindle.

Once you have finished with your preview, click the ‘x’ on the top right corner to go back to the publishing page. You are now finished with the first page and can move on to the second. If you are ready to move on, click “Save and Continue”. If you want to save your work so far, you can choose “save as draft”. You can save your work at any stage of the process and your new book will appear on your bookshelf as a Draft.

Page 2 of the KDP process deals with Rights & Pricing.

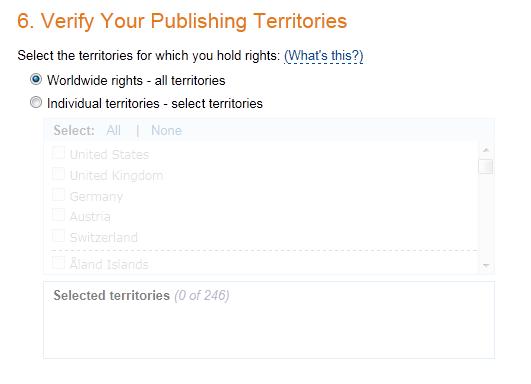
Part 6 – Verify Your Publishing Territories. In this section, you will select the territories for which you have the right to publish your book. For most of you, you will select “Worldwide rights”, which means that you have the right to publish your book everywhere in the world. This enables Amazon to sell your book anywhere in the world from their site. Currently, Kindle has stores in the US, UK, and Germany, but more stores may open in the future.
Part 7 – Choose Your Royalty. Amazon offers two royalty rates. 35% and 70%. The 70% royalty rate is only available for books priced between $2.99 and $9.99. All other prices must select the 35% royalty option. It is important to note that you cannot price your ebook lower than $0.99. Make sure to choose the correct royalty rate here for your price! It would suck to only receive 35% royalty on a book priced between $2.99 and $9.99 when you could be earning twice as much!
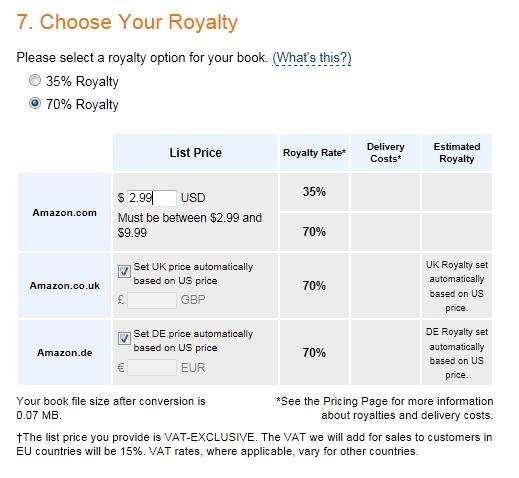
Select the royalty rate that applies, then enter your list price. Beside the list price, you will find information about the delivery cost amazon will charge for your book as well as the estimated royalty you will earn for every book sold. For the UK and DE stores, you can choose to enter your own price or you can choose to “set price automatically based on US price.”
*NOTE: Amazon is constantly working to add new countries to their sales network. Most of these countries follow the same 70% / 35% royalty structure as the US store. The exceptions are India, Brazil and Japan. You will only earn 35% in these three stores regardless of your price UNLESS you are enrolled in KDP select for this title. Then you will earn 70% during the 90 days your book in enrolled. You can always renew your 90 day enrollment when your term is up, but you cannot have your book for sale on any other site. Not even your own.
Part 8 – Kindle Book Lending

This is a simple yes or no choice. Do you want people to be able to borrow your book from their friends and family? If so, click “Allow lending for this book.” This will allow someone who has purchased your book from the Amazon website to loan out their copy of your ebook to someone they know for a period of 14 days.
Finished!!

When you have finished all the steps above, simply check the box at the bottom of page 2, then click “Save and Publish”. Your book will go into a queue to be reviewed and will now show up on your Amazon KDP bookshelf as “publishing”. When your book is available for sale in the Kindle store, it’s status will say “Live”.
From your bookshelf, you can edit, change or delete a book. On the far right side of the page, you will see a tab marked “Actions”. Clicking on this tab will bring up the following choices:

Once your book is Live, you can check your sales by clicking on “Reports” at the top of the KDP page, then selecting “Month-to-Date Unit sales”.
I hope this step-by-step walk-through will help you easily find your way through Amazon’s KDP (kingle direct publishing) site. If you have any questions or corrections, please feel free to contact me through my website at www.sarracannon.com.

