How To Publish An eBook on Kobo
Kobo is a great new direct market. Uploading to Kobo is easy and quick. Below, I will take you through the upload process step-by-step.
1. Sign in to your Kobo Books account. From your dashboard, click on the word ‘ebooks’ in the upper right-hand corner.
2. This will take you to a screen that will show you each of your published books. To make changes to an existing book, simply click on that book’s cover. To create a new book, click on “create a new book” on the right side of the screen.
3. Kobo separates their upload process into 4 parts. Part 1 is ‘Describe Your eBook’. This is where you will enter your book’s title, series title, author name, image, isbn, description and categories.
Let’s take a look at this one box at a time. First, you will enter your book’s title.
The next box asks you to enter a book subtitle. Kobo will list your book’s subtitle in parenthesis next to your title, so if you want your series name listed next to your book, you could enter it here. For example, my book Beautiful Demons is the first book in the Peachville High Demons series. In this sub-title box, I enter “Peachville High Demons, #1”. When my book shows up on Kobo, the title says Beautiful Demons (Peachville High Demons, #1). If you do not enter anything in this box, there will be no parenthesis next to your title.
Next, enter your series title. For my book, Beautiful Demons, for example, I enter “Peachville High Demons” because that is the name of the overall series. Even if you entered this as your sub-title, you will still want to enter it here to link all series ebooks together on their site.
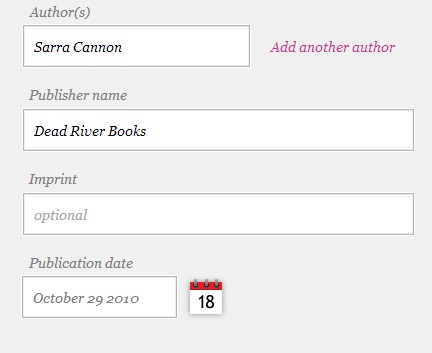
Now you will enter your author, publisher and imprint names as well as your publication date.
Author speaks for itself. Simply enter your name or your pen name. If you want to add another author, simply click ‘Add another author’. Your publisher name is the name of the publishing company you are calling yourself. You can put your name in this box if you do not have a company name.
Imprint means the line of books or if you have separated your books into imprints just like a traditional publisher sometimes does. For example, Harlequin is a major publisher. Harlequin SuperRomance is an imprint published by Harlequin. All books in the SuperRomance line or imprint all share certain characteristics. I leave this box blank.
Kobo also allows you to put in your publication date.
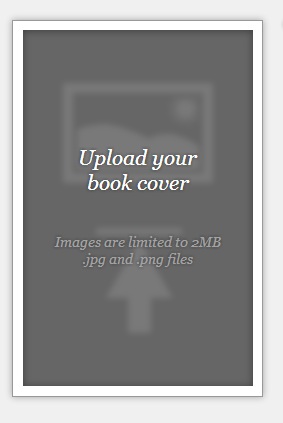
To the right of this box where you entered your title, you will see a large box that will prompt you to upload your book’s cover.
Simply click on this box and it will bring up a search dialog for your computer. Find your cover image and upload it here. Make sure your image file is less than 2MB in size.
Next you will enter your book’s identifiers.
Your eISBN is your ebook ISBN. If you have not purchased ISBNs from Bowker and assigned one to this ebook, you will leave this box blank. You cannot use a free ISBN from Smashwords here on Kobo!
Primary Print ISBN is the ISBN you have assigned to the print version of this book.
Ebook Language is the language your book is written in.
Now answer the question of whether your book is public domain or not. If you wrote your book and are going to sell it on Amazon, you must click “no” here.
Finally, you will want to enter your book’s categories. Click on the pink link ‘edit categories’. This will bring up a category dialog box that will allow you to choose 3 different categories for your book.
Navigate through the categories and when you see one that best matches your book, click inside the grey box to the left. This will put a green check mark in that box and will place that category on the right side. If you want to remove one of your choices, simply click on the green checkmark and it will disappear. When your 3 categories are set, click “confirm”.
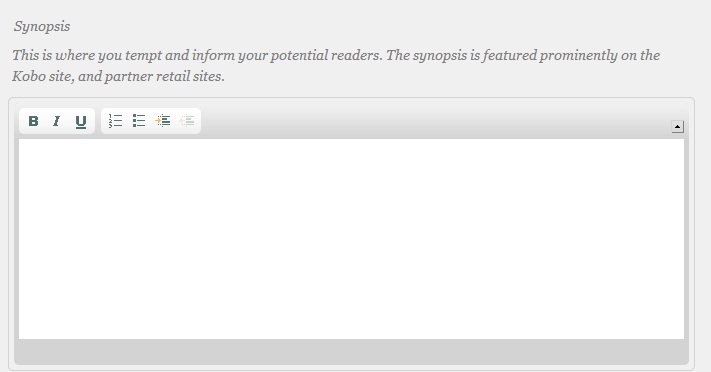
All you have left of Part 1 is to enter your book’s synopsis.
You can use Bold, Underline and bullets here in this editor, so use this to your advantage! This is the synopsis/description readers will see when they are browsing the store and it will be a major factor in deciding whether to purchase your book. Make sure to proofread this carefully!
Now you are finished with Part 1. On the right hand side, you will see a green box that says “Save and Continue”. Click here if you would like to move on to Part 2. You will also see an option to save and stop editing. You can click this option at any time. You can then come back to finish editing this book later.
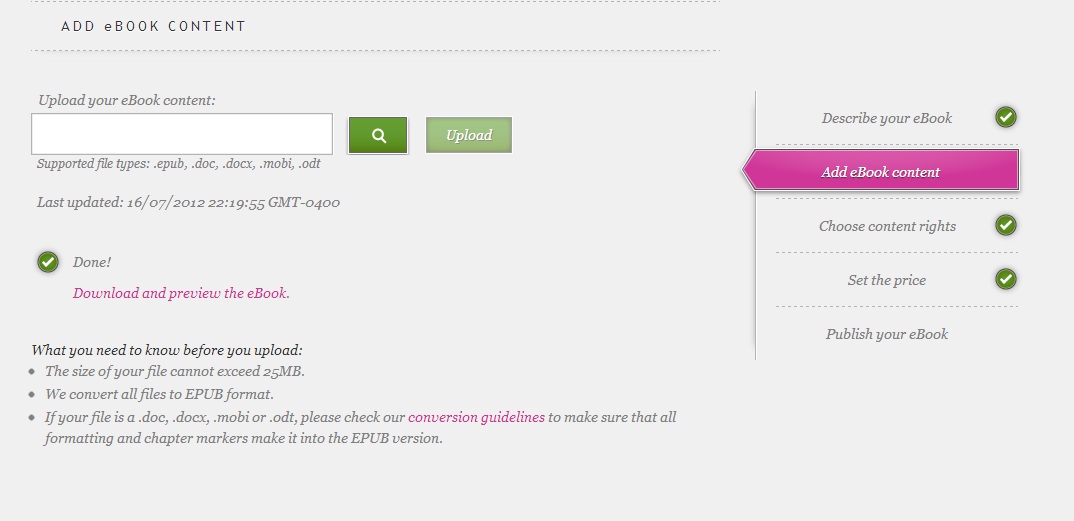
4. Part 2 of the uploading process is called “Add eBook Content”. This is where you upload your eBook’s formatted file. Kobo now allows you to upload EPUB, DOC, DOCX, MOBI or ODT (open office document) as your eBook’s file. If you already have an EPUB, I recommend uploading that here. Kobo will take any other file format and convert it to EPUB.
You can click anywhere inside the white box or on the little magnifying glass to open a search box. Find your eBook file and upload it to the Kobo store.
Once your book is uploaded you will see an option to “Download and preview the ebook”. You can preview your ebook on any Kobo device or in Adobe Digital Editions.
Again, once you are finished with this step, click “Save and Next”.
5. Set Your Content Rights. This page only has two questions. Do you want to add DRM? And do you own worldwide rights?
Kobo defaults to a yes or green check on each of these questions. I choose not to put DRM or Digital Rights Management on my ebooks, so I always move the slider over to no, or the red x.
Most people own worldwide rights to their novels. The only reason you wouldn’t own geographic rights is if you’ve sold them to another publisher. In this case, you would move the slider to the red x and choose the territories in which you have the rights to publish this novel.
When you have made your choices, click “Save and Next”.
6. Next you will be prompted to Set the Price of your ebook.
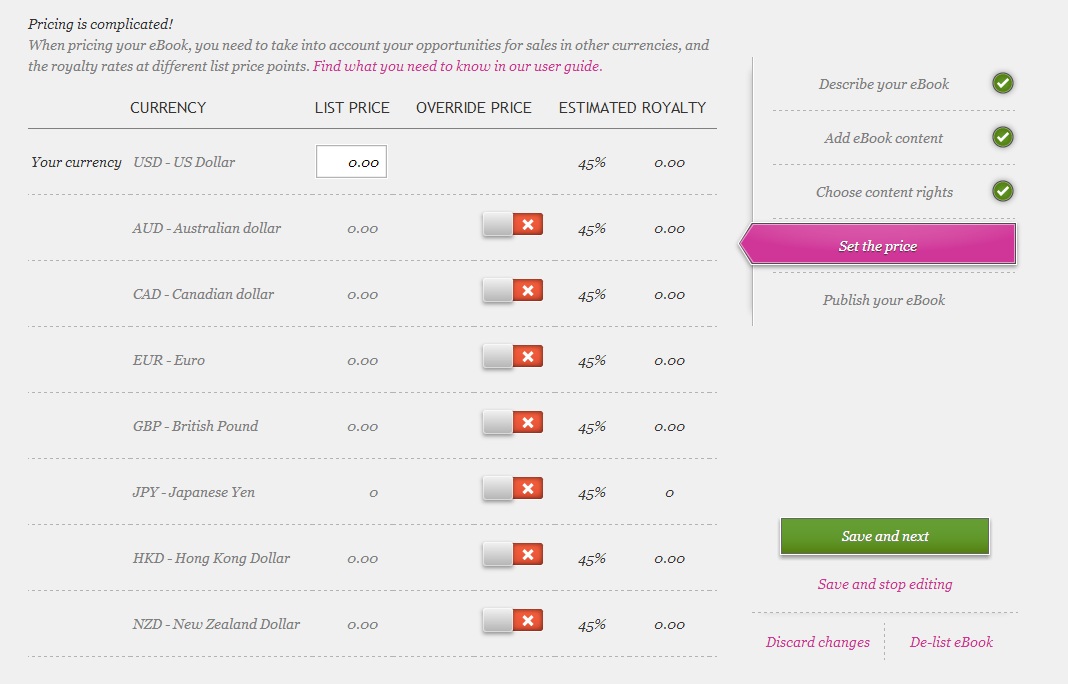
When you enter a list price in the top box, Kobo will automatically calculate a price for the remaining territories that is based on this original US price. In the second column you are given a choice to either accept or override this choice. If you wish to override the choice and set your own price for a specific territory, move the slider over and choose your own price.
The next column tells you the royalty percentage Kobo will pay you based on the price you entered. Kobo pays 70% on books priced between $1.99 and $12.99. Any price outside this number receives a 45% royalty. Kobo DOES allow you to set your book to free.
Once you have chosen your price, click “Save and Next”.
7. As you enter your information in each of the four parts, Kobo will let you know if you have missed anything or if all of the necessary information has been received by either putting up a red exclamation point next to the part that is missing or by showing a green check mark next to the completed parts. Once everything has been filled in properly, you should see four green check marks on the right hand side.
Now you are ready to publish. Select a publication date and click “Publish eBook”.
Congratulations! Your book is now on its way to the Kobo store!


